 8:29 AM
 Bijay Kumar
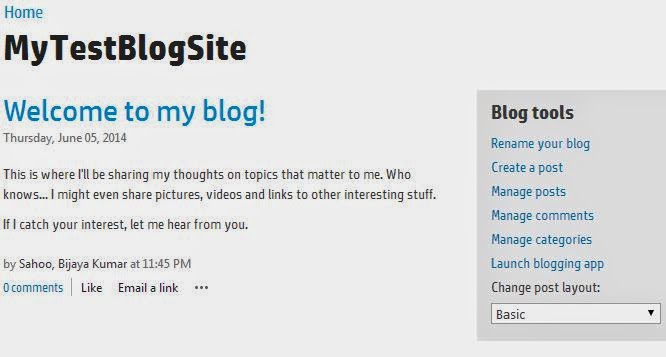
In this post we will discuss how we can add attachment field to Post list in SharePoint 2013 blog site. Before proceeding you can check out this article to know more about how to create a blog site in SharePoint 2013.
Also you can check out:
- How to Get Current Logged in User and Display Name using SharePoint 2013 REST API?
- SharePoint 2013 architecture tutorial
- SharePoint 2013 JavaScript Client Object Model Example
1. Open your site and Click on manage post from right side from home page.

2. Click on List tab from ribbon and then expand form web part, Now click on the default new form as shown in the fig below.

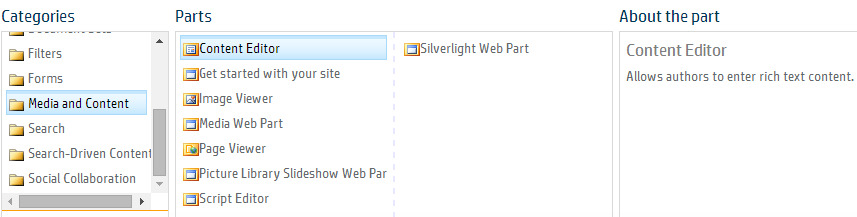
3. It show the page in add mode. Here click on the Add webpart, then it will show the page to add webpart. From the categories, choose media content and then choose content editor webpart and click add as shown in the fig below:
4. Now your content eitor webpart is added. Click inside the webpart and from the ribbon choose edit source. Then add the following code to the edit source dialog box and click ok.
<div>
<a title="Attach File" class="ms-toolbar" accesskey="I" onclick="javascript:UploadAttachment();" href="javascript:UploadAttachment()">
<img width="16" height="16" align="absMiddle" alt="Attach File" src="/_layouts/images/attachtb.gif" style="border-width: 0px;"/> </a>
<a id="ctl00_m_g_7df5d998_1390_4e67_8fc4_2da066cbcf7d_ctl00_ctl01_ctl00_toolBarTbl_RptControls_diidIOAttach{generate-id()}" href="javascript:UploadAttachment()" style="visibility: hidden;"> </a>
<a class="ms-toolbar" id="ctl00_m_g_7df5d998_1390_4e67_8fc4_2da066cbcf7d_ctl00_ctl01_ctl00_toolBarTbl_RptControls_diidIOAttach_LinkText" accesskey="I" onclick="javascript:UploadAttachment();" href="javascript:UploadAttachment()">Attach File</a> </div>
5. Now click on the page tab and click on stop editing page from ribbon.
6. Now see the effect as one attachment control is added to the new form as shown in the fig below:

Also you can check out:
- How to Get Current Logged in User and Display Name using SharePoint 2013 REST API?
- SharePoint 2013 architecture tutorial
- SharePoint 2013 JavaScript Client Object Model Example
1. Open your site and Click on manage post from right side from home page.

2. Click on List tab from ribbon and then expand form web part, Now click on the default new form as shown in the fig below.

3. It show the page in add mode. Here click on the Add webpart, then it will show the page to add webpart. From the categories, choose media content and then choose content editor webpart and click add as shown in the fig below:

4. Now your content eitor webpart is added. Click inside the webpart and from the ribbon choose edit source. Then add the following code to the edit source dialog box and click ok.
<div>
<a title="Attach File" class="ms-toolbar" accesskey="I" onclick="javascript:UploadAttachment();" href="javascript:UploadAttachment()">
<img width="16" height="16" align="absMiddle" alt="Attach File" src="/_layouts/images/attachtb.gif" style="border-width: 0px;"/> </a>
<a id="ctl00_m_g_7df5d998_1390_4e67_8fc4_2da066cbcf7d_ctl00_ctl01_ctl00_toolBarTbl_RptControls_diidIOAttach{generate-id()}" href="javascript:UploadAttachment()" style="visibility: hidden;"> </a>
<a class="ms-toolbar" id="ctl00_m_g_7df5d998_1390_4e67_8fc4_2da066cbcf7d_ctl00_ctl01_ctl00_toolBarTbl_RptControls_diidIOAttach_LinkText" accesskey="I" onclick="javascript:UploadAttachment();" href="javascript:UploadAttachment()">Attach File</a> </div>
5. Now click on the page tab and click on stop editing page from ribbon.
6. Now see the effect as one attachment control is added to the new form as shown in the fig below:

 Posted in